- Video Production
- Video Making Tips for Beginners
- What is digital video production
- What is the Rule of Thirds
What is the Rule of Thirds in Digital Composition? A Visual Guide
The Rule of Thirds is a simple composition guideline: imagine a tic-tac-toe grid over your frame.
Instead of centering your subject, place key elements along the lines or -- even better -- at the four intersection points.
This off-center placement instantly creates more balanced, dynamic shots that feel naturally engaging and pleasing to the eye.
Key Takeaways - What is the Rule of Thirds in digital composition?
- Think in thirds: Mentally overlay a 3×3 grid on your frame. Place your subject along the lines or at the intersections (“power points”) to create instant balance.
- Turn on your grid: Activate the grid overlay in your camera or editing software -- it’s the fastest way to start composing with intention.
- Direct the eye: Off‑center placement invites the viewer’s gaze to travel, making your shot feel more dynamic and natural.
- Use “looking room”: Leave empty space in the direction your subject is facing or moving to add anticipation and story.
- Learn it, then break it: Center your subject when you want symmetry, authority, isolation, or a direct connection -- especially in vertical video. Break the rule only after you understand why it works.
- Practice deliberately: Shoot the same scene three ways -- center, left third, right third -- to train your eye to see the difference immediately.
Picture this: you’ve just filmed your very first video. You hit play, excited… but something feels off.
The lighting is fine, the audio is clear -- yet the image looks flat, your subject awkwardly placed. Like a snapshot, not a story.
The culprit is almost always the same quiet force: composition -- not knowing where to place your subject in the frame.
A well-composed frame does half the storytelling before anyone speaks.
And the simplest, most trusted tool to get there is the Rule of Thirds. It’s the difference between footage that merely looks and footage that truly speaks.

Let’s explore it together, gently and step by step.
What is the Rule of Thirds? My Simple Definition
The Rule of Thirds is a simple composition guideline.
Imagine a tic-tac-toe grid over your frame; instead of centering your subject, place key elements along the lines or at the four intersection points.
This creates balanced, dynamic shots that feel naturally engaging and pleasing to the eye.
So, what is the Rule of Thirds in digital composition? In the simplest possible terms, it’s a gentle guideline (not a strict law!) that helps you place the important parts of your video frame in a way that feels naturally pleasing to the human eye.
Think of it as a simple trick to make your shots feel balanced and engaging without any complex math or expensive equipment.
How It Works
Imagine overlaying a tic-tac-toe board on top of your video frame. This grid is made of two equally spaced horizontal lines and two equally spaced vertical lines, dividing your image into nine equal parts.
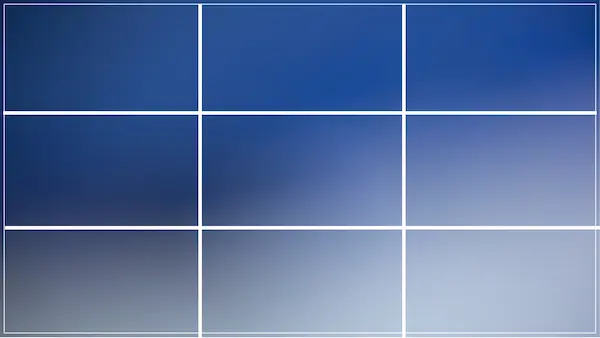
The name comes from this simple division: you are splitting the frame into thirds -- three equal sections across and three equal sections down.
The Rule of Thirds suggests that instead of placing your main subject right in the dead center of the frame (which can sometimes look static or flat), you should position it along one of these lines or, even better, at one of the four points where the lines intersect.
The Magic of "Power Points"
This is where it gets interesting. Those four crossing points are often called "power points" (or sometimes "crash points"). They are the most important locations in your frame because they naturally draw the viewer’s attention.
Placing your key subject at or near these intersection points creates a composition that feels:
- Balanced: Nothing feels too heavy on one side.
- Dynamic: The image feels alive and ready to tell a story.
- Engaging: The viewer’s eye is invited to explore the scene.
A Gentle Note on Eye Movement
Here’s something I’ve noticed in my own experience...
Because most of us are used to reading from left to right and top to bottom, our eyes have a very natural, almost comforting habit of drifting to that top-left spot first. It’s like taking a little walk across the screen -- starting at the top left, gliding over to the right, and then dropping down in a soft "Z" shape.
So, if you have something really important -- a person’s eyes, a beautiful detail, or a piece of text you want people to see right away -- that top-left power point is your warmest, most welcoming invitation.
You’re not forcing anyone’s attention; you’re simply working hand in hand with how their eyes naturally want to explore.
Quick Reference Guide
Here is a simple way I think about where to place common elements:
| Element | Where to Place It |
|---|---|
| Subject's eyes | Along the top horizontal line |
| Horizon line | Along the top or bottom horizontal line |
| Main subject | Near any power point (intersection) |
| Moving object | Leave space in front; place the object on the opposite third |

Think of this less as a rigid rule and more as a best practice that helps you place important elements intentionally. It’s a tool to help your footage speak clearly, so your viewers can focus on the story you’re telling.
How I Apply the Rule of Thirds in My Own Shots
To apply the rule of thirds, first enable your camera or editing software’s grid overlay.
Place your main subject where the lines intersect, position horizons along the top or bottom line, and leave “looking room” in front of a subject’s gaze.
Practice off-center compositions to instantly create more dynamic, balanced shots.
Now that you know what the grid looks like, let’s make it work for you. This is the part where theory turns into action, and it’s easier than you might think.
Turning on the Grid Overlay
-
On an iPhone: Go to Settings > Camera. Scroll down to the Composition section and toggle Grid on.
- On most Android phones: Open the Camera app, look for the Settings gear icon, and find the “Grid lines” or “Composition” option.
- In video editing software: Programs like Adobe Premiere Pro and DaVinci Resolve offer built-in composition tools. Depending on the app, you can easily turn on a grid overlay from the viewer menus, drag custom guidelines out from the rulers, or apply a grid effect to your timeline.
Where I Place My Subject
Once the grid is visible, you can start making intentional choices about placement:
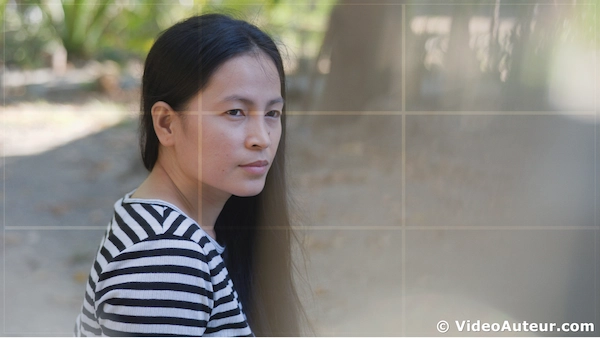
1. Place your subject on an intersection point. If you’re filming a person, try positioning their eyes or face near one of the four power points.
--
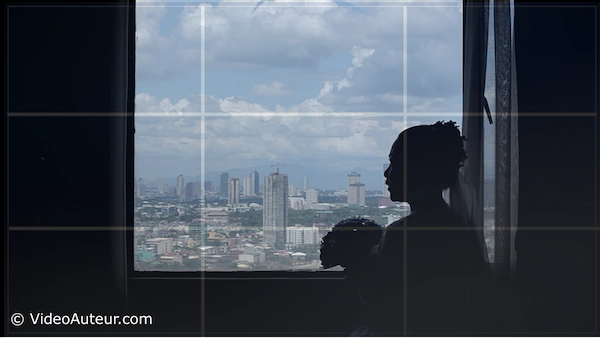
2. Position the horizon line on the top or bottom horizontal line. For landscapes or establishing shots, avoid placing the horizon exactly in the middle. Place it along one of the horizontal grid lines to give more visual weight to either the sky or the foreground.

--
3. Give your subject "looking room." If your subject is looking to the left or right, leave open space in the direction they are looking. This creates a sense of movement and anticipation.
A Simple Practice Exercise
Here’s a gentle exercise you can try today: Choose a simple subject -- a friend, a plant, or even a coffee mug. Film it in three different ways:
- Dead center.
- Placed on the left intersection point.
- Placed on the right intersection point.
Watch the footage back. Notice how the off-center compositions feel more dynamic and give the subject a sense of space and context.
This simple practice will train your eye to see the grid even when the overlay is turned off.
Why the Rule of Thirds Makes Your Composition More Compelling
Placing your subject off-center invites the viewer’s eye to travel across the frame instead of stopping at a static center.
This creates gentle tension and balance, mimics how our gaze naturally shifts in real life, and encourages exploration of the surrounding space, making your shot feel more dynamic, intentional, and engaging.
So, the grid works. But why does it work? Understanding the “why” is what takes you from a beginner who follows rules to a creator who makes intentional, artistic choices.
When a subject is placed dead center, our eyes often rest there and stop looking.
But when you place a subject off-center using the Rule of Thirds, you invite the viewer’s eye to travel across the frame. This movement creates a gentle sense of tension and balance, encouraging the audience to explore the negative space and the context around your subject.

Psychologically, we find these off-center compositions more interesting because they mimic how we experience the real world. We rarely stare at a single point in the center of our vision; our gaze shifts constantly.
By using the Rule of Thirds, you are simply aligning your video with this natural human behavior.
What the Research Says
It turns out there is science behind this gentle art. Researchers have found that when creators use compositional guides like the Rule of Thirds:
- Viewers naturally focus on key elements faster.
- People spend more time engaged with the image.
- The images receive higher ratings for overall aesthetics.
The grid acts as a "geometric guiding structure." It helps our brains process information more easily by directing our attention to the most important parts of the picture right away.
Creating Mood and Story
Beyond just "looking good," this guideline helps you establish the specific mood of your scene:
-
Balance: Placing a large object on one side and a smaller object on the other can create a sense of visual equilibrium, making the scene feel stable and harmonious.
-
Tension: Placing a subject near the edge of the frame can make them feel small, isolated, or overwhelmed by their environment.
- Storytelling: If a character is looking toward the empty space in the frame, it creates anticipation. The viewer instinctively wonders, "What are they looking at?" This draws them deeper into your narrative.
A Note on Growing as a Creator
This suggests that as you grow as a creator, your appreciation for -- and ability to use -- this guideline will deepen naturally.
--
Still, with all that said, please remember this: the Rule of Thirds is not a command. Think of it as a trusted friend who offers gentle guidance, not a strict teacher waving a red pen.
Personally, in my own practice, I use this rule often -- and I also break it.
Sometimes a centered composition is exactly what your subject or story needs, and that’s a beautiful choice too.
The goal isn’t perfection; it’s intention. Knowing why the rule works gives you the freedom to follow it, bend it, or set it aside, all while still creating images that feel true to your vision.
When to Break the Rule of Thirds (and Why It’s Okay)
Yes, I break the rule of thirds most of the time.
Break the rule when your story calls for it.
Center a subject to convey power, loneliness, perfect symmetry, or a direct, intimate connection with the audience.
In vertical video, centering faces often feels more natural.
It’s okay because rules are guides, not laws -- once understood, you can intentionally break them to serve your vision.
Yes, you can -- and sometimes should -- break the Rule of Thirds. In fact, the most compelling videos often do.
Here is the most important thing to remember: Rules are meant to be understood, not blindly followed. Once you truly grasp the Rule of Thirds, you gain the power to break it intentionally.

Breaking the rule isn’t a mistake; it’s a creative choice that shows you are making artistic decisions to serve your story.
Think of it this way: you can’t break a rule you don’t understand. So...
- First, learn it. Apply it until it becomes second nature.
- Then, when your story calls for something different, break it with confidence.
When Centering Works Best
There are specific moments when placing your subject dead center is exactly what your scene needs:
- Symmetry and Authority: Centered shots can create a feeling of power, perfect order, or even eeriness. Think of the grand, symmetrical frames in Wes Anderson’s films or the imposing way a villain might stand still in the center of the screen.

--
- Isolation: Placing a tiny character in the middle of a vast, empty frame can emphasize their loneliness or vulnerability in a way that off-center framing might dilute.

--
- Reflections: When shooting a mirror or a water reflection, centering the subject often creates a perfect, pleasing symmetry that the Rule of Thirds grid would actually disrupt.

--
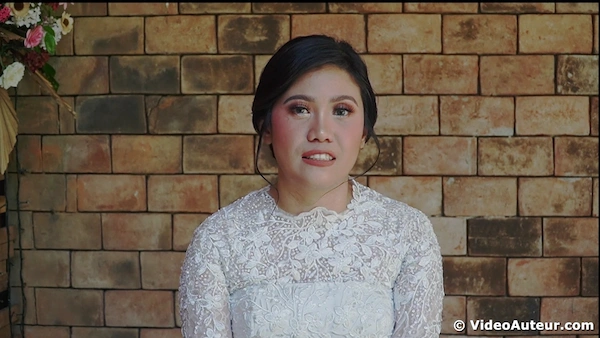
- Direct Connection: In a 16:9 widescreen frame, a centered composition often works beautifully for close-up shots where someone is speaking directly to the audience. It feels intimate and personal, like they are looking right into your soul.
A Special Note on Vertical Video (9:16)
If you are shooting for social media on a phone, the aspect ratio changes the game.
While the Rule of Thirds is still effective for composing objects in a vertical frame, it is generally less applicable for people, especially close-ups of faces.
In a 9:16 vertical frame, centering a person often creates a more natural and visually appealing composition.
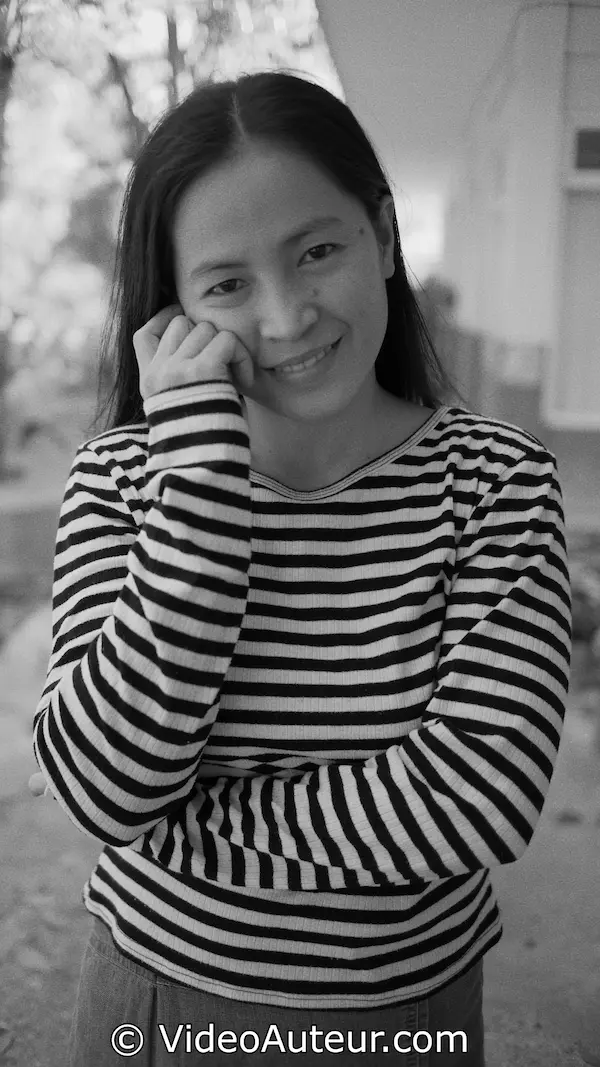
I notice that if I push a person’s face too far toward the edges of a vertical screen, it can appear stretched or awkward.
So, for vertical videos featuring people, feel free to break the rule and center them.
FAQs
What is the rule of thirds in simple terms?
What is the rule of thirds in simple terms?
It's dividing your frame into nine equal parts with two horizontal and two vertical lines, then placing important elements along those lines or at their intersections.
Why is it called the rule of thirds?
Why is it called the rule of thirds?
Because you're dividing the frame into three equal parts horizontally and vertically -- three columns and three rows.
Does the Rule of Thirds apply to both photos and video?
Does the Rule of Thirds apply to both photos and video?
Yes! It works for photography, video, digital design, and even web layouts.
How do I turn on the grid overlay on my camera or in editing software?
How do I turn on the grid overlay on my camera or in editing software?
iPhone: Settings → Camera → Grid. Android: Camera Settings → Grid lines. Editing software varies—check View or Window menus for grid options.
Why is the Rule of Thirds important?
Why is the Rule of Thirds important?
It creates visual balance, provides breathing room for your subjects, and naturally guides the viewer's eye to the most important parts of the frame.
Can you break the Rule of Thirds? When?
Can you break the Rule of Thirds? When?
Absolutely! Break it for symmetry, authority, isolation, or when filling the frame.
Is the Rule of Thirds useful for beginners?
Is the Rule of Thirds useful for beginners?
Very much so.
It provides a simple, clear framework that helps beginners move beyond guesswork and start making intentional compositional choices.
What are some common examples of the Rule of Thirds in video?
What are some common examples of the Rule of Thirds in video?
Character interviews (eyes on top line), landscapes (horizon on top/bottom third), and walking shots (subject on one third, space in direction of movement).
How can I practice the Rule of Thirds today?
How can I practice the Rule of Thirds today?
Turn on the grid in your phone's camera app.
Shoot the same subject or scene three ways: centered, on the left third, and on the right third.
Review all three.
The more you do it, the more it gets ingrained into your head.
What’s the difference between the Rule of Thirds and the Golden Ratio?
What’s the difference between the Rule of Thirds and the Golden Ratio?
The Rule of Thirds uses a simple 3x3 grid. The Golden Ratio uses a more complex spiral and ratio (1.618:1) that is often found in nature. The Rule of Thirds is a simplified approximation of the Golden Ratio, making it easier to use for beginners.
Conclusion
The Rule of Thirds isn’t a rigid command -- it’s a quiet, trusted guide that turns your frame into a conversation with the viewer.
By placing your subject off‑center, you invite the eye to wander, to explore, and to feel the gentle tension that makes an image come alive.
When your story calls for stillness, symmetry, or a direct, unblinking connection, centering becomes an equally powerful choice.
The magic lies not in following the grid perfectly, but in knowing why it works, so you can follow it, bend it, or set it aside with confidence and purpose.
Composition is never about rules; it’s about intention.
So, as you reach for your camera: where will you guide the eye next -- and what story will that placement begin to tell?
-- and turn your storytelling skills into shareable videos.
You might like these
How to Start Video Production for Beginners Step by Step
How to start video production for beginners step by step guide. Focus on purpose, audience, and message. Skip the overwhelm. Create videos that truly connect.
How Does Image Stabilization Work? 4 Key Techniques
How Does Image Stabilization Work? Learn 4 techniques -- OIS, IBIS, external devices & software -- to create smoother, shake-free videos and photos.
How to Become a Videographer: Complete Beginner's Guide
How to Become a Videographer without expensive gear. Master storytelling, camera basics, audio, editing, and find clients -- complete beginner's guide.


Alvin Motilla is the creator of VideoAuteur.com, where he helps everyday people make videos that truly connect with audiences. With over 20 years of experience spanning scriptwriting, documentaries, corporate, and freelance video production, he champions the human side of creation over gear obsession. A graduate of AB Mass Communication, he believes that showing up with heart matters more than owning expensive equipment. Off-screen, Alvin enjoys biking with his wife and daughter, staying active, and studying Scripture.

Get Your Free Cheat Sheet
The Most Common Video Mistakes (and How to Fix Them)

Sign up to download it instantly. You’ll also get tips, step-by-step guidance, and gear guides to make video creation simple.
What's New


-
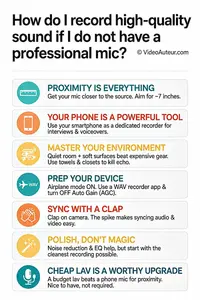
How do I record high-quality sound if I do not have a professional mic
 How do I record high-quality sound if I do not have a professional mic? Discover simple, zero-budget techniques using your phone for studio-quality audio.
 -
What is B-roll and why does my video need it? A Guide
 Wondering what is B-roll and why does your video need it? This guide reveals simple tips to add visual variety, hide edits, and keep viewers watching longer.
 -
What is the Rule of Thirds in Digital Composition? Visual Guide
 What is the Rule of Thirds in digital composition? A visual guide to placing subjects on power points for better storytelling. Learn how to use the grid.


Get Your Free Cheat Sheet
The Most Common Video Mistakes (and How to Fix Them)

Sign up to download it instantly. You’ll also get tips, step-by-step guidance, and gear guides to make video creation simple.
Copyright © 2014- VideoAuteur.com All rights reserved
This website does not sell any personal information.
Get Your Free Cheat Sheet
The Most Common Video Mistakes (and How to Fix Them)
Sign up to download it instantly. You’ll also get tips, step-by-step guidance, and gear guides to make video creation simple.