- Video Production
- Video Making Tips for Beginners
- What is digital video production
- What is B-roll and why does my video need it
What is B-roll and why does my video need it? A Beginner’s Guide
B-roll is the supplementary footage -- close-ups, action shots, and scenery -- that shows what your main audio (A-roll) is describing.
You need it to add visual variety, cover edits smoothly, and keep viewers emotionally connected, transforming a plain talking-head video into a polished, engaging story.
Key Takeaways - What is B-roll and why does my video need it?
-
B-roll is the visual "showing" that supports your A-roll "telling," turning a plain explanation into an engaging story.
-
It serves three critical functions: adding emotional texture, maintaining viewer attention through visual variety, and allowing for seamless, professional-looking edits.
-
Good B-roll is intentional: Shoot wide, medium, and close-up shots for 10–15 seconds each, but edit them down to 3–5 seconds to keep the pacing lively yet digestible.
-
The "Pancake Timeline" method is the easiest workflow: keep your A-roll (voice and story) on the bottom track and layer B-roll on top to cover cuts or illustrate points.
-
You don't need to film everything yourself: High-quality stock footage from sites like Pexels or Pixabay can fill gaps, though mixing in a few of your own personal clips adds a unique layer of authenticity.
-
Always mute B-roll audio unless you specifically need a sound effect; let your clear A-roll narration guide the viewer while the visuals dance in the background.
Maybe it happened in a comment section.
Maybe a client said it kindly but pointedly: "This just needs a little more... something."
Maybe you were scrolling through a tutorial and the host casually mentioned "grabbing some B-roll" like everyone was supposed to already know what that meant.
And you sat there thinking: is there a secret ingredient I'm missing?

Here's the good news. There is an ingredient -- and it's simpler and more forgiving than you think.
This article exists to answer, plainly and without any of the intimidating jargon, the exact question you probably typed into a search bar: what is B-roll and why does my video need it?
By the end, you'll not only know the answer -- you'll know how to start using it in the very next video you make, with whatever camera or phone is already sitting in your hand.
What’s the difference between A-roll and B-roll?
A-roll is the main footage that tells your story, like interviews or direct-to-camera explanations.
B-roll is supplemental footage that shows details, actions, or context while the A-roll audio plays underneath.
Together, they combine "telling" with "showing" to create an engaging viewing experience.
I think of it this way: A-roll is the skeleton of your video, and B-roll is the flesh and skin that brings it to life.
The A-roll is your main footage -- the interview, the "talking head," or you explaining something directly to the camera. It is the part of your video that tells the story.
If someone watched only your A-roll, they would still understand your message because it carries the narrative forward.
The B-roll is everything else. It is the supplemental footage layered on top to show the audience what you are talking about.
It’s the visual spice, the close-ups, and the details that keep your viewer engaged.
A Simple Way I Visualize It

Imagine you are building a house.
- The A-roll is the pillars and the frame. These are the big structural posts that must be there first. Without them, the house doesn’t stand. But if you only showed someone the pillars being built, it wouldn’t be very exciting to watch.
- The B-roll is the walls, the paint, the roof, and the finishing touches. These are the elements that turn a bare frame into a beautiful, livable home.
You need the structure (A-roll) to hold everything up, but you need the details (B-roll) to make it worth looking at.
A-roll Tells, B-roll Shows
Let’s look at a cooking video to make this concrete:
-
A-roll: You standing in the kitchen, looking at the camera, explaining the recipe step-by-step.
- B-roll: Close-up shots of the flour being sifted, the knife chopping vegetables, or the food sizzling in the pan.
When you watch the B-roll, you are seeing the action, but you are still hearing your voice from the A-roll explaining what is happening.
A Common Beginner Mistake
One detail that often trips up beginners is the audio. When you play B-roll, you typically do not use the sound recorded with that clip.
Instead, you mute the B-roll’s original audio (or turn it way down) and let the A-roll’s audio play underneath it.
-
This allows your voice to guide the viewer while their eyes wander to the beautiful visuals you’ve captured.
- It’s a gentle way to keep the story moving without overwhelming the audience with noise.
When you put these two together -- your voice guiding the story and the visuals supporting it -- something magical happens. The video stops feeling like a lecture and starts feeling like an experience.
Why does my video need B-roll? (The tangible benefits)
B-roll transforms a simple talking-head video into an engaging story.
It adds emotional depth by showing what you describe, holds viewer attention with visual variety, and lets you edit seamlessly -- hiding cuts and pauses.
The result feels polished, professional, and keeps your audience watching until the end.
In my experience, I notice that this is really the heart of the matter: B-roll is what makes your video feel satisfying, complete, and worth watching.
I think of video like a meal.
Your A-roll is the main course, but without the side dishes, the garnish, and the flavors that come from B-roll, the dish feels incomplete and unsatisfying. You might eat it, but you won’t enjoy it.
B-roll provides those extra ingredients that turn a simple recording into a rich, nourishing experience for your viewer.

Here are the practical, gentle reasons why your video needs it:
1. It Adds Texture and Emotion
There is a profound difference between hearing someone describe a sunset and seeing it. Words are powerful, but they can only go so far.
B-roll gives your story texture, emotion, and a sense of place that narration alone cannot deliver.
When you show a close-up of a trembling hand or a wide shot of a quiet street, you aren’t just telling a story; you are inviting your viewer to feel inside the moment.
It helps them connect with your content on a deeper, more human level.
2. It Keeps People Watching
This is where the stakes are higher than many beginners realize.
A single, unbroken shot of a person talking can be exhausting for the brain to process. It is exactly the kind of thing that triggers viewers to click away.
Visual variety -- changing camera angles, adding cutaways, and layering in B-roll -- is one of the most effective ways to keep attention.
It gives the viewer’s eyes a new focal point, refreshing their interest just as they might start to drift.
It’s not about tricking them; it’s about caring enough about their experience to keep things engaging.
3. It Allows for Graceful Editing
While many people talk about B-roll as a way to "hide mistakes," try to shift that mindset.
You aren’t shooting B-roll just to cover up a cough or a stumble. You are shooting it because it is a delicious ingredient in your final dish.
That said, a beautiful side effect is that it allows for seamless editing. If you pause to take a breath, stumble over a word, or need to cut out a long silence, a cut to B-roll covers that "seam" completely.
The viewer never sees the edit; they just see a natural, flowing story. It makes the final video feel polished and professional without you having to be perfect on the first take.
A Gentle Reminder on Pacing
Yes, shooting and editing B-roll takes extra time, planning, and hard drive space. It is absolutely worth the effort.
However, there is one crucial tip that many overlook: give your viewers time to chew their food.
You might be tempted to cut as fast as possible, flashing through images in a blur.
But when B-roll moves too quickly, the human brain can’t process the beauty or the meaning of the shot. This can overwhelm the senses and make the viewer feel irritated rather than engaged.
Be kind to your audience.
Let each shot breathe.
Give them a few seconds to absorb what they are seeing before moving on.
When you do this, your video becomes a calm, inviting space where your story can truly land.
What makes good B-roll? (How to shoot it with confidence)
Good B-roll is intentional visual punctuation that deepens your story.
Match every clip to what your A-roll is saying, and shoot with confidence by holding steady, capturing at least 10–15 seconds per shot, and varying your angles (wide, medium, close-up).
Good B-roll isn’t random; it’s intentional.
I think of each clip as a piece of visual punctuation. Just as a comma or a period helps a sentence make sense, a well-chosen B-roll clip helps your viewer understand your message more deeply.
Before you press record, ask yourself: “What is my A-roll saying right now, and what visual would help the viewer feel or understand that better?”
When you shoot with this mindset, you aren’t just filling space or covering up mistakes.
You are building a visual language that speaks directly to your audience’s heart and mind.

A Few Reliable Shot Types to Try
You don’t need a cinema camera to get beautiful results. Here are four simple shot types you can capture with just your phone:
- Wide, Establishing Shots: These show the whole room, the workshop, or the neighborhood. They tell the viewer where they are and set the scene.
- Medium Shots: These capture someone in the middle of doing the thing you’re talking about -- typing, cooking, walking, or building. They show action and interaction.
- Tight Close-ups: Focus on hands, tools, small details, or facial expressions. These add intimacy and texture, letting the viewer see the small things they might otherwise miss.
- Macro Shots: These are extremely close-up shots that reveal a miniature world. They can give your video a real "wow" factor by showing details invisible to the naked eye. It's a favorite of mine.
- Slow Movement: A gentle pan across a workspace or a slow tracking shot as someone walks adds a calm, polished energy without needing fancy gear.
Gentle Tips for Shooting with Confidence
If you are new to this, here are a few caring reminders to help you feel steady and sure:
-
Hold Steady: Use both hands to hold your phone, or lean it against a wall, a table, or a stack of books. Shaky footage can be dizzying for viewers, so take a moment to find stability.
-
Shoot for Time: Hold every shot for at least 10 to 15 seconds. Even if you only end up using two or three seconds in your final cut, that extra "runway" gives you room to find the steadiest, cleanest moment during editing. It’s better to have too much footage than not enough.
-
Chase the Light: Natural light from a window or outdoors works wonders. It makes even phone footage look soft, beautiful, and professional.
-
Change Your Angle: Don’t just shoot everything from eye level. Try getting low to the ground, shooting from high above, or looking through objects to create depth and interest.
-
Shoot a Sequence: Try to capture a simple rhythm for each subject: Wide --> Medium --> Close-up --> Detail. This creates a natural flow that feels satisfying to watch.
- Stay Quiet: When shooting B-roll, try not to talk. Your voice might accidentally record on the microphone, which can be distracting. Let the environment speak for itself.
Common Mistakes to Avoid
As you practice, be gentle with yourself. Here are a few things to watch out for -- things I see other video creators make again and again:
- Cutting shots too short while filming: This is the most common mistake. Always give yourself that 10-second buffer.
- Shooting only one type of shot: If every clip looks the same, it won’t add visual interest. Mix up your angles and distances.
- Using irrelevant footage: If your narration says "we move fast" but the B-roll shows someone staring blankly, it quietly undercuts your trust with the viewer. Make sure the visual matches the story.
- Moving the camera too quickly: Fast, jerky pans can make viewers feel dizzy or overwhelmed. Move slowly and smoothly to let the eyes rest.
- Overwhelming the senses: Remember, you are serving a nutritious meal, not just a sugar rush. Don’t flash images too quickly. Give your viewers’ brains time to process and enjoy each shot.
You are creating something beautiful. Trust your instincts, take your time, and remember that every shot you capture is a gift to your future viewer.
How to use B-roll in your edit (a beginner-friendly workflow)
Use the “pancake timeline” method: lay your main footage (A-roll) as the base, then stack B-roll clips on the track above to cover cuts or illustrate your narration.
Mute the B-roll audio, trim clips to 3–5 seconds, and let your clear A-roll voice carry the story while the visuals enhance it.
Editing B-roll is simpler than it looks. In fact, the most effective way to think about it is as a "pancake timeline."
Imagine your A-roll (your main footage and voice) is the bottom pancake -- steady, continuous, and the foundation of your dish.
Your B-roll is the top pancake, stacked gently on whatever you need to cover or enhance. You can slide that top layer around to cover a mistake, add a visual detail, or simply keep the story moving, all without disturbing the main layer underneath.

Here is a calm, step-by-step workflow I personally use. You can let it get you started:
1. Lay Down Your Foundation
Start by placing your A-roll on the bottom track of your timeline.
This is your story’s backbone.
Ensure your audio is crisp and clear here, as it will carry the heart of your video.
2. Layer the B-Roll on Top
Drag your B-roll clips onto a video track above your A-roll. Place them exactly where you want the viewer’s eyes to wander.
This could be:
- To cover an edit where you cut out a mistake or a long pause.
- To show what you are describing in your narration.
- To add emotional texture to a specific moment.
3. Mute or Lower the B-Roll Audio
This is a crucial step for a clean edit.
Unless you specifically want a sound effect from the clip (like the sizzle of a pan), mute or turn down the audio of your B-roll clips.
- Let your A-roll’s voice continue playing clearly underneath.
- This ensures your narrative stays uninterrupted while the visuals "dance" over the top.
Remember: A video with crisp, clear audio and simple visuals will always engage people more deeply than 4K video with terrible, distracting sound.
4. Find the Sweet Spot for Pacing
How long should each clip last?
-
Aim for 3 to 5 seconds in your final edit. This is long enough for the viewer’s brain to register what they are seeing, but short enough to keep the energy lively.
-
Cut before it feels stale. A good rule of thumb is: if you start getting bored watching the clip yourself, it’s probably time to cut away. Feel.
- Don’t cut too fast. Avoid flashing images in a blur. Give the eyes and brain a moment to rest and absorb the beauty of the shot. You are serving a nutritious meal, not a sugar rush.
A Note on Preparation
You might notice a difference between how long you shoot and how long you edit.
- Shoot long: Aim to capture 10–15 seconds of footage per clip.
- Edit tight: Trim those clips down to 3–5 seconds in your timeline.
This gap is intentional.
Shooting long gives you the freedom to find the steadiest, most beautiful moment later.
As a general guideline, try to capture 4 to 6 times the length of your final video in raw B-roll. If you are making a 1-minute video, shoot 4 to 6 minutes of supporting footage.
Most of it won’t make the cut, and that’s okay. Having that extra material means you’ll never be stuck wondering, "What do I show here?"
By following this simple layering method, you aren’t just covering cuts; you are guiding your viewer’s emotions and creating a story that feels whole, satisfying, and complete.
Where can I find B-roll footage if I can’t shoot my own?
You can find high-quality B-roll on free stock video sites like Pexels, Pixabay, and Mixkit -- perfect for beginners.
If you need a larger library, paid subscriptions such as Artlist, Storyblocks, or Envato Elements offer extensive catalogs.
Always check each clip’s license to ensure it fits your project, whether personal or commercial.
Sometimes, life gets in the way of filming. You might not have the time, the right equipment, or the ability to be in the exact location you need.
That is completely okay. You don’t need to film everything yourself to make a great video.
Stock footage is B-roll, and it is a wonderful, accessible resource for anyone who needs a little help filling in the blanks.

Calm, Trustworthy Sources
There are many places to find high-quality clips that fit your story. The best part? You can find great options for free, or for a small monthly fee if you need a larger library.
Free Options (Great for beginners):
Paid Options (Larger libraries, often for pros):
- Artlist
- Storyblocks
- Envato Elements
A gentle reminder: Always check the license on the site you use.
Reputable sites make it very clear whether you can use a clip for personal projects (like a school assignment), or commercial projects (like a business video).
Using quality, legal sources protects you and ensures your work looks professional.
A Tip for Adding Your Own Authenticity
Here is a genuinely underused tip that can make a huge difference: try to mix a little of your own footage in with the stock clips you download.
Even if you only have two seconds of something you personally shot -- perhaps a quick shot of your desk, your hands, or your room -- cutting that alongside your stock B-roll makes the whole sequence feel far more original.
It stops the video from looking like it was just "pulled from a template" and adds a layer of authenticity that only you can provide.
It’s a small move, but it adds a surprising amount of heart to your work.
You. Just. Add. You.
A Note on AI-Generated Footage
You might also see tools that use artificial intelligence (AI) to generate video clips from text prompts. These tools are becoming more common and can be useful for specific things:
- Where they shine: Abstract visuals, stylized backgrounds, and atmospheric shots that are hard to film in real life.
- Where to be careful: Generating realistic people is still an area where AI is improving. It can sometimes look a bit "off" or unnatural.
Most experienced editors today treat AI as a helpful starting point or a complement to real footage, rather than a full replacement.
If you use it, think of it as a way to create unique backgrounds or moods, but rely on real human elements to connect with your audience.
Remember, the goal is to support your story, not to replace the human connection.
Whether you...
- shoot it yourself,
- find it through a stock site, or
- generate it with AI,
... what matters most is that the visuals help your viewer feel the story you are telling.
Why do they call it B-roll? (A quick, warm history lesson)
It’s a charming holdover from the days of physical film.
Editors loaded the main story footage onto the A-roll, then used a second reel -- the B-roll -- for cutaways to hide splices or smooth transitions.
Even though we now edit digitally, the name endures as a nod to that secondary reel of supplemental shots.
The name isn’t mysterious or complicated; it’s actually a gentle nod to the craft’s roots.
"B-roll" simply refers to the second reel of film that editors used in the early days of cinema.

Back then, editing was a hands-on, physical process. The main footage -- the interview or the story being told -- was loaded onto the A-roll.
But when editors needed to hide a splice mark, a blemish, or simply transition smoothly between two shots, they would cut away to a second reel of supplemental footage. That second reel was the B-roll.
Over time, even after we stopped using physical film reels and moved to digital timelines, the name stuck. Today, we don’t spin actual reels of film, but the principle remains exactly the same.
You are still layering visual content on top of your main footage to create a smoother, more polished, and more beautiful final product.
So, when you use B-roll in your own videos, you aren’t just following a trend. You are continuing a tradition that has been part of storytelling for nearly a century.
You’re officially an insider now, carrying on a legacy of care and craft.
FAQs
What does B-roll mean in video editing?
What does B-roll mean in video editing?
It's the supplemental footage -- anything beyond your main interview or talking-head shot -- used to add visual context, cover edits, and support the primary story being told.
What is another name for B-roll footage?
What is another name for B-roll footage?
You'll sometimes hear it called B-reel, cutaway footage, supplemental footage, supporting visuals, or insert shots. They all describe the same idea.
What are examples of B-roll footage?
What are examples of B-roll footage?
Establishing shots of a location, close-ups of hands or objects, someone performing a task, archival footage, screen recordings, and slow tracking shots are all common examples.
Does B-roll have audio?
Does B-roll have audio?
Usually not -- or at least, not audio you're meant to notice. It's typically muted or lowered so the A-roll's audio can keep playing underneath it uninterrupted.
Is B-roll video or photos?
Is B-roll video or photos?
Mostly video, but it doesn't have to be. Still photographs, graphics, and simple animations can all function as B-roll if they add context or visual interest.
How much B-roll should I shoot?
How much B-roll should I shoot?
A helpful rule of thumb is to aim for four to six times the length of your final video. If your finished piece will be five minutes long, try to gather 20 to 30 minutes of raw B-roll.
How long should a B-roll clip be?
How long should a B-roll clip be?
In your finished edit, individual clips typically run about 2 to 5 seconds. While filming, though, hold each shot for at least 10 to 15 seconds so you have room to choose the cleanest moment later.
What are common B-roll mistakes?
What are common B-roll mistakes?
Cutting a shot too short while filming, relying on only one type of shot instead of a mix, and using footage that doesn't actually match what's being said are the three most common ones.
Can CapCut generate B-roll?
Can CapCut generate B-roll?
Yes -- CapCut's AI tools can generate short video clips from text prompts or an entire script. It's currently best used for abstract or stylized visuals rather than realistic footage of people, and works well as a starting point alongside your own footage.
What is the difference between B-roll and BTS?
What is the difference between B-roll and BTS?
B-roll supports and enhances your main story. BTS (behind-the-scenes) footage documents the making of the video itself -- the crew, the setup, the process -- rather than the story being told.
What is B-roll video for Instagram?
What is B-roll video for Instagram?
It’s simply B-roll used in Instagram content, often short, aesthetic clips that set a mood or show a product in action, overlaid with music or voiceover.
Conclusion
B-roll isn’t just extra footage. It’s the quiet, generous act of showing your audience what words alone can’t deliver.
Every intentional clip you layer over your story says, “I care enough to help you see, feel, and understand.”
That shift -- from simply recording a message to crafting an experience -- is what separates forgettable videos from the ones that linger.
Start small.
Let your next video include one tight close-up of a relevant detail.
Let your edit breathe with a gentle establishing shot.
Notice how it feels.
Over time, these small choices become your visual signature -- a calm, confident way of guiding people through the story you want to tell.
So, now that you know the ingredient, what’s the first scene you’ll shoot to turn your next video into an experience worth watching?
You might like these
DIY Camera Stabilizer: Repurpose, Don't Rebuild
Learn how to create a DIY camera stabilizer using gear you already own -- camera strap, tripod, monopod and more. Achieve steady video without buying anything.
How to Start Video Production for Beginners Step by Step
How to start video production for beginners step by step guide. Focus on purpose, audience, and message. Skip the overwhelm. Create videos that truly connect.
How Does a Steadicam Work? Smooth Shots Explained
How Does a Steadicam Work? Learn the physics of gimbal balancing, operator technique, and smooth camera movements for professional video storytelling.

Alvin Motilla is the creator of VideoAuteur.com, where he helps everyday people make videos that truly connect with audiences. With over 20 years of experience spanning scriptwriting, documentaries, corporate, and freelance video production, he champions the human side of creation over gear obsession. A graduate of AB Mass Communication, he believes that showing up with heart matters more than owning expensive equipment. Off-screen, Alvin enjoys biking with his wife and daughter, staying active, and studying Scripture.

Get Your Free Cheat Sheet
The Most Common Video Mistakes (and How to Fix Them)

Sign up to download it instantly. You’ll also get tips, step-by-step guidance, and gear guides to make video creation simple.
What's New


-
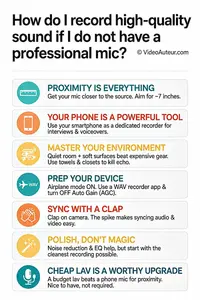
How do I record high-quality sound if I do not have a professional mic
 How do I record high-quality sound if I do not have a professional mic? Discover simple, zero-budget techniques using your phone for studio-quality audio.
 -
What is B-roll and why does my video need it? A Guide
 Wondering what is B-roll and why does your video need it? This guide reveals simple tips to add visual variety, hide edits, and keep viewers watching longer.
 -
What is the Rule of Thirds in Digital Composition? Visual Guide
 What is the Rule of Thirds in digital composition? A visual guide to placing subjects on power points for better storytelling. Learn how to use the grid.


Get Your Free Cheat Sheet
The Most Common Video Mistakes (and How to Fix Them)

Sign up to download it instantly. You’ll also get tips, step-by-step guidance, and gear guides to make video creation simple.
Copyright © 2014- VideoAuteur.com All rights reserved
This website does not sell any personal information.
Get Your Free Cheat Sheet
The Most Common Video Mistakes (and How to Fix Them)
Sign up to download it instantly. You’ll also get tips, step-by-step guidance, and gear guides to make video creation simple.